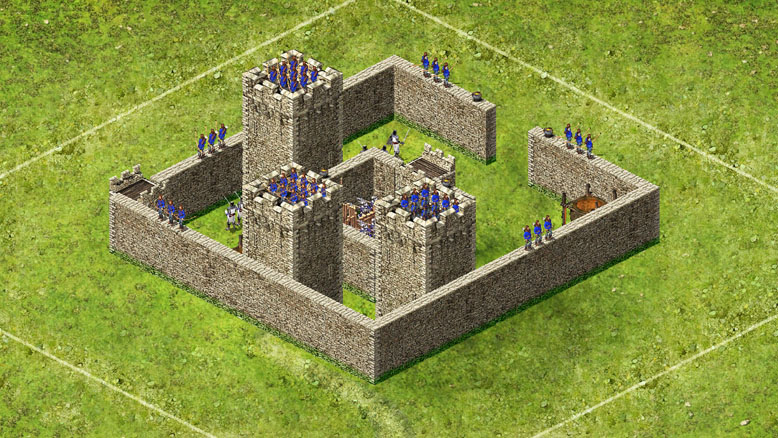
Wolf Castle #2 is slightly stronger than wolf Castle #1 but is still a great castle to destroy for honor. The Wolf’s diverse array of defenses means you need to keep an eye out for the unseen as this castle boasts both Sally Forth Knights and invisible Killing Pits. Beware!
| Scouts needed to get castle report | 2+ |
| AI castle Sally forth | Yes (4 Knights) |
| Armed Peasants emitted from Tunnel | — |
| Armed Peasant tunnel location | — |
| Killing Pits | Yes |
Setup
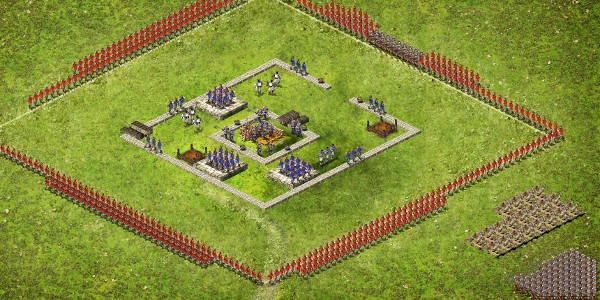
The first and only wave is predominantly comprised of Archers. Spread them two or three thick just outside the white line and make sure to box in the right side corner of the castle where your Catapults are to prevent any of the Sally Forth Knights from killing your Catapults. Target your Catapults at The Wolf’s Keep and position the Pikemen behind the Catapults, in the corner; this gives the Catapults some time to do damage to the castle without inflicting splash damage on your Pikemen.
Result
This was a satisfying attack even though we lost a few Catapults to enemy Archers due to sloppy placement; this leaves us some room for improvement. However, none of the Catapults were killed by the sally forth which means our “Archer boxing” of the castle was both predictable and effective. The few Killing Pits scattered about the layout did very little damage to our assault force.
| Total recruitment cost (values are in gold) | 16,600 |
| Recruitment value of surviving units | 12,700 |
| Actual recruitment cost to remove | 3,900 |
Note: when attacking from any side but the front be aware that under certain conditions your Pikemen will target the wall just in front of the keep instead of walking in and ending the battle. If this happens you need to make sure the Keep is cleared of defenders before your Pikemen reach it or attack from the front.

![]()